微软纯净PE安装系统
微软纯净PE没有操作界面,怎么安装系统呢?熟悉批处理操作的同学,不妨一起来探讨一番。
准备工作
1. 准备一个容量不小于8GB的U盘
2. 将U盘分成两个分区:
(1) FAT32分区(PE分区),容量1GB,用于存放微软PE;
(2) NTFS分区(DATA分区),用于存放系统镜像、安装脚本和配置文件等。
配置PE分区
2. 开始菜单找到"部署和映像工具环境"工具,以管理员身份启动,然后执行下列命令创建PE:
copype amd64 C:\WinPE_amd64(1) 微软纯净PE为英文版,因此需要添加中文语言包。
(2) 系统安装脚本会用到WMIC工具,因此需要安装 WinPE-WMI 和 WinPE-WMI_zh-cn 组件。
(3) 以管理员身份打开命令提示符,执行下列命令:
Dism /Mount-Image /ImageFile:"C:\WinPE_amd64\media\sources\boot.wim" /index:1 /MountDir:"C:\WinPE_amd64\mount"cd "C:\Program Files (x86)\Windows Kits\10\Assessment and Deployment Kit\Windows Preinstallation Environment\amd64"Dism /Add-Package /Image:C:\WinPE_amd64\mount /PackagePath:WinPE_OCs\zh-cn\lp.cab
Dism /Add-Package /Image:C:\WinPE_amd64\mount /PackagePath:WinPE_OCs\WinPE-FontSupport-zh-cn.cab
Dism /Add-Package /Image:C:\WinPE_amd64\mount /PackagePath:WinPE_OCs\WinPE-WMI.cab
Dism /Add-Package /Image:C:\WinPE_amd64\mount /PackagePath:WinPE_OCs\zh-cn\WinPE-WMI_zh-cn.cab
4. 将PE语言设置为中文。
Dism /Image:C:\WinPE_amd64\mount /Set-UILang:zh-cn
Dism /Image:C:\WinPE_amd64\mount /Set-SysLocale:zh-cn
Dism /Image:C:\WinPE_amd64\mount /Set-UserLocale:zh-cn
Dism /Image:C:\WinPE_amd64\mount /Set-InputLocale:0804:00000804
Dism /Image:C:\WinPE_amd64\mount /Set-TimeZone:"China Standard Time"Dism /Image:C:\WinPE_amd64\mount /Set-SKUIntlDefaults:zh-cn
5. 修改 C:\WinPE_amd64\mount\Windows\System32\startnet.cmd
(1) PE启动时会自动运行 startnet.cmd 脚本,借用此脚本调用系统安装脚本 main.bat。
(2) startnet.cmd 脚本原始内容如下:
@echo off
wpeinit
(3) 修改后的 startnet.cmd 脚本内容如下:
@echo off
wpeinitfor %%a in (C D E F G H I J K L M N O P Q R S T U V W X Y Z) do (if exist %%a:\iso\*.iso set src=%%a:)if not defined src goto errorif exist %src%\main.bat (call %src%\main.bat) else (goto error)goto :eof:errorecho.&echo The specified file could not be found.goto :eof
6. 待PE配置完毕后,在命令提示符窗口执行下列命令保存PE设置:
Dism /Unmount-Image /MountDir:C:\WinPE_amd64\mount /commit7. 将 C:\WinPE_amd64\media 文件夹里面的所有文件,拷贝到U盘PE分区根目录下即可。
配置DATA分区
按照下图所示目录层次结构,配置U盘DATA分区:
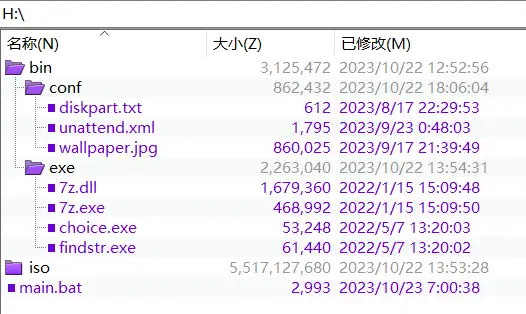
DATA分区文件
2. 文件 diskpart.txt
(1) 作用:用于格式化磁盘和创建分区。
(2) 示例:
list disk
select disk 0
clean
convert gpt

create partition efi size=260
format quick fs=fat32 label="System"assign letter="S"create partition primary size=102400
format quick fs=ntfs label="Windows"assign letter="W"create partition primary size=500
format quick fs=ntfs label="Recovery"assign letter="R"set id="de94bba4-06d1-4d40-a16a-bfd50179d6ac"gpt attributes=0x8000000000000001

create partition primary size=102400
format quick fs=ntfs label="Application"assign letter="T"create partition primary
format quick fs=ntfs label="Data"assign letter="U"list volume
exit
3. 文件 wallpaper.jpg
(1) 作用:可设置为桌面壁纸。
4. 文件 unattend.xml
(1) 作用:提前配置好计算机名称,用户名和密码,桌面壁纸等,避免安装过程需要人为操作。
(2) 示例(计算机名称:MyPC,壁纸:Wallpaper.jpg,用户名:ABC,密码:123456):
<?xml version='1.0' encoding='utf-8'?><unattend xmlns="urn:schemas-microsoft-com:unattend">
    <settings pass="specialize">
        <component name="Microsoft-Windows-Shell-Setup" processorArchitecture="amd64" publicKeyToken="31bf3856ad364e35" language="neutral" versionScope="nonSxS" xmlns:wcm="http://schemas.microsoft.com/WMIConfig/2002/State" xmlns:xsi="http://www.w3.org/2001/XMLSchema-instance">
            <ComputerName>MyPC</ComputerName>
            <Themes>
                <ThemeName>Custom</ThemeName>
                <DesktopBackground>C:\Windows\Web\Wallpaper\My\Wallpaper.jpg</DesktopBackground>
            </Themes>
        </component>
    </settings>
    <settings pass="oobeSystem">
        <component name="Microsoft-Windows-Shell-Setup" processorArchitecture="amd64" publicKeyToken="31bf3856ad364e35" language="neutral" versionScope="nonSxS" xmlns:wcm="http://schemas.microsoft.com/WMIConfig/2002/State" xmlns:xsi="http://www.w3.org/2001/XMLSchema-instance">
            <OOBE>
                <SkipMachineOOBE>true</SkipMachineOOBE>
                <SkipUserOOBE>true</SkipUserOOBE>
                <NetworkLocation>Work</NetworkLocation>
                <ProtectYourPC>3</ProtectYourPC>
            </OOBE>
            <AutoLogon>
                <Password>
                    <Value>123456</Value>
                    <PlainText>true</PlainText>
                </Password>
                <Username>ABC</Username>
                <Enabled>true</Enabled>
                <LogonCount>1</LogonCount>
            </AutoLogon>
            <UserAccounts>
                <LocalAccounts>
                    <LocalAccount>
                        <Password>
                            <Value>123456</Value>
                            <PlainText>true</PlainText>
                        </Password>
                        <Group>Administrators</Group>
                        <Name>ABC</Name>
                    </LocalAccount>
                </LocalAccounts>
            </UserAccounts>
            <FirstLogonCommands>
                <SynchronousCommand wcm:action="add">
                    <Order>1</Order>
                    <CommandLine>cmd /c if exist C:\Windows\Panther\Unattend.xml cmd /c del C:\Windows\Panther\Unattend.xml /f</CommandLine>
                </SynchronousCommand>
            </FirstLogonCommands>
        </component>
    </settings></unattend>
5. 文件 7z.exe 和 7z.dll
(1) 作用:用于解压提取镜像文件。
(2) 下载链接:7-zip
6. 文件 choice.exe 和 findstr.exe
(1) 作用:系统安装脚本main.bat会调用它们。
(2) 文件来源:可从系统 C:\Windows\System32 文件夹里面拷贝。
7. 文件 main.bat
(1) 作用:系统安装脚本,用于工具调用,镜像提取,磁盘分区,系统设置等操作。
(2) 示例:
@echo off:CopyFileset workspace=%~d0copy /y %workspace%\bin\exe\*.* X:\Windows\System32\ >nul:CheckDiskecho list disk | diskpart
wmic DiskDrive where Index=0 get MediaType /value>MediaType.txtfor /f "tokens=2 delims==" %%i in ('type MediaType.txt') do (set "MediaType=%%i")del MediaType.txtif /i not "%MediaType%" == "Fixed hard disk media" (goto FoundError):RemindUserecho.&echo Are you sure to continue ? If yes, disk 0 will be formatted.echo.&echo [1] Yesecho.&echo [2] Cancel:backecho.&set /p op="Select the number: "if /i "%op%" == "1" goto FormatDiskif /i "%op%" == "2" goto :eofgoto back:FormatDiskdiskpart /s %workspace%\bin\conf\diskpart.txt:SelectISOecho.&echo [Images]dir /a-d/b/s %workspace%\iso\*.iso | findstr /n . >images.txtfor /f "tokens=1* delims=:" %%i in (images.txt) do (echo.&echo [%%i] %%~nxj):loopecho.&set /p index="Select the number: "if /i "%index%" equ "e" goto :eoffindstr "^%index%:" images.txt>target.txtif not "%errorlevel%" equ "0" goto loopfor /f "tokens=1* delims=:" %%i in (target.txt) do (set "image=%%j")del images.txt target.txt:ExportImageif exist W:\tmp rd /q /s W:\tmpmd W:\tmp
7z.exe x "%image%" -o"W:\tmp"dism /Get-ImageInfo /ImageFile:W:\tmp\sources\install.wimecho.&set /p index="Type the index number: "dism /Export-Image /SourceImageFile:W:\tmp\sources\install.wim /SourceIndex:%index% /DestinationImageFile:W:\new.wimrd /q /s W:\tmp:SkipOOBEecho.&echo [SkipOOBE]echo.&echo [1] Yes, skip oobeecho.&echo [2] Noecho.&choice /c 12 /n /t 20 /d 1 /m "Select the Number: "if errorlevel 2 (set skip_oobe=No)if errorlevel 1 (set skip_oobe=Yes):ApplyImagedism /apply-image /imagefile:W:\new.wim /index:1 /applydir:W:\del W:\new.wimecho.&bcdboot W:\Windows /l zh-cn

:SetConfif /i "%skip_oobe%" == "No" goto Finishif not exist W:\Windows\Web\Wallpaper\My md W:\Windows\Web\Wallpaper\Mycopy /y %workspace%\bin\conf\wallpaper.jpg W:\Windows\Web\Wallpaper\My\ >nulif not exist W:\Windows\Panther md W:\Windows\Panthercopy /y %workspace%\bin\conf\unattend.xml W:\Windows\Panther\Unattend.xml >nul:Finishwpeutil rebootgoto :eof:FoundErrorecho.&echo Disk Check Error.goto :eof
(3) main.bat 说明
【CopyFile】 拷贝工具到PE环境,便于调用。

【CheckDisk】 安装脚本会基于磁盘0创建分区,这里事先判断磁盘0是否为移动硬盘或U盘,避免不小心将U盘格式化。

【RemindUser】 提醒用户:继续操作会格式化磁盘0,是否继续。

【FormatDisk】 格式化磁盘0,并创建分区。

【SelectISO】 选择系统镜像。

【ExportImage】 有的镜像包含多个系统版本,需要手动选择对应版本进行安装。

【SkipOOBE】 如果选择Yes,就会跳过用户名设置界面。

【ApplyImage】 正式安装系统。

【SetConf】 与 【SkipOOBE】对应,只有【SkipOOBE】选择Yes时,才会执行【SetConf】操作。

【Finish】系统安装完成,重启系统。

【FoundError】与【CheckDisk】对应,如果【CheckDisk】检查到磁盘0是移动硬盘或U盘时,会跳转到【FoundError】。
8. ISO文件夹
(1) 作用:用于存放Windows镜像文件。
系统安装
将配置好的U盘插入电脑。
2. 开机长按电脑对应的启动热键,进入BIOS启动引导界面。
3. 选择系统安装U盘,进入PE安装环境。
4. 按提示完成系统安装。
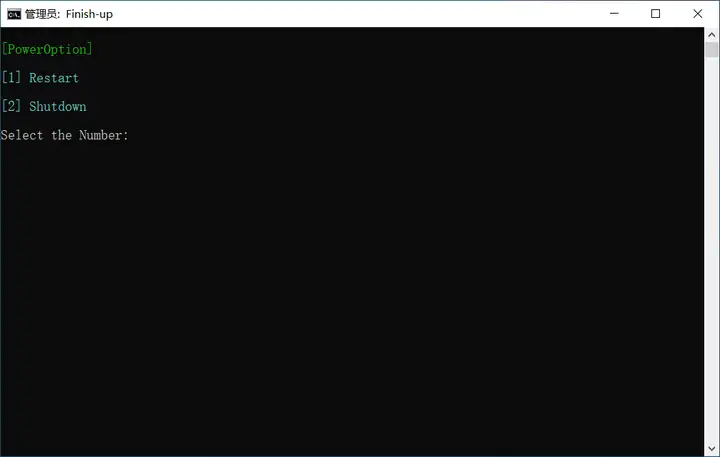
安装界面演示
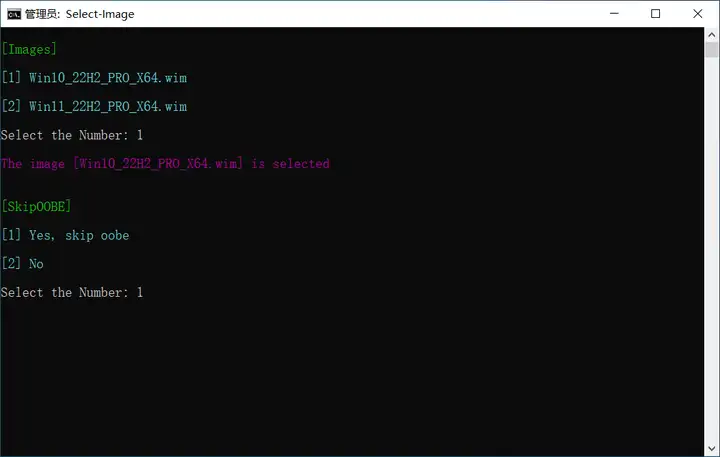
选择镜像
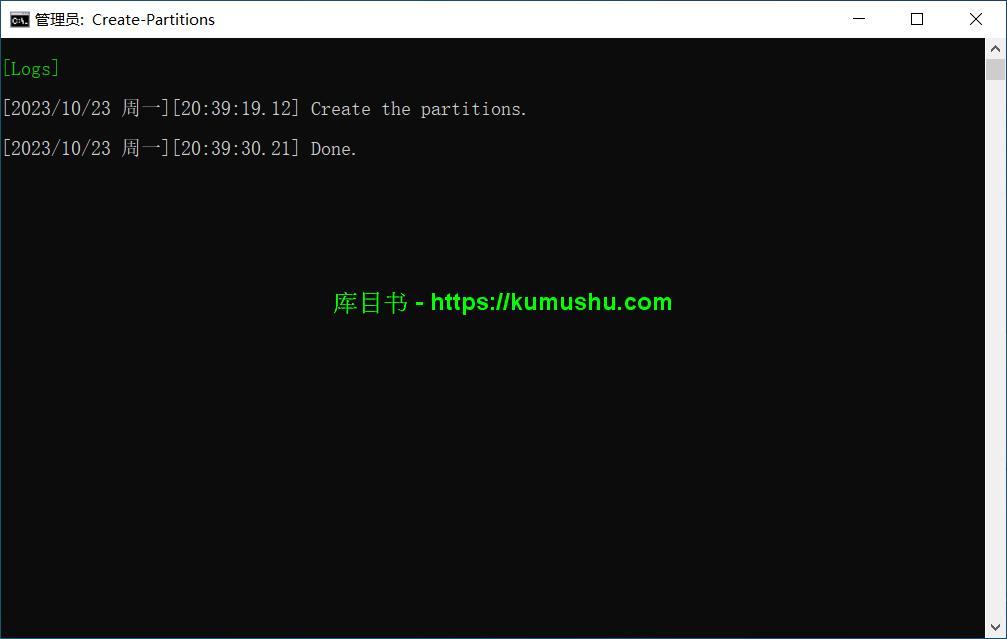
创建分区
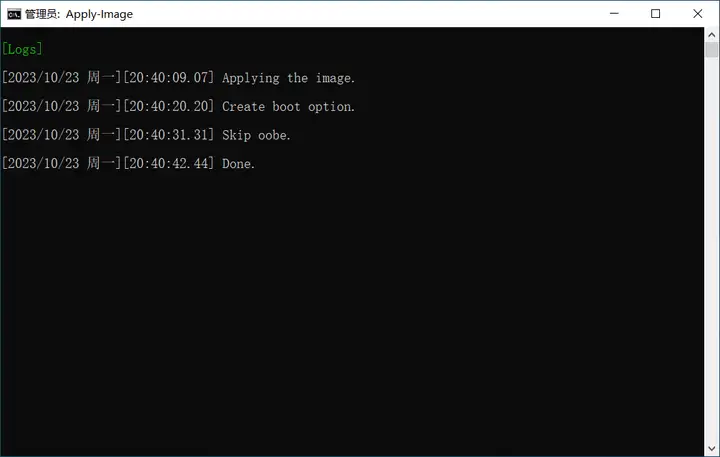
安装镜像
结束